Idaho Snow Load & Wind Load Basics for Barndominiums (Wood-Frame): What Boise Homeowners Should Know Before They Build

Stock photo of a partially built wood-framed barndominium in Southern Idaho with visible snow on the ground and roof, highlighting structural framing details and roof geometry, set against Boise foothills under an overcast sky.

Strong buildings start with the right design loads—especially in Southern Idaho’s snow and wind

In Boise and across Southern Idaho, a “barndominium” isn’t just a style choice—it’s a structural challenge done right. Snow load and wind load affect everything from roof framing and truss specifications to connections, shear walls, and long-term performance. If those loads are guessed (or copied from a different town), you can end up with an overbuilt budget-buster or—worse—an underbuilt structure that struggles under Idaho weather.

This guide breaks down what snow load and wind load mean, how they’re determined, and what smart homeowners can do early to keep their custom barndominium (wood-frame) design smooth from permitting to final build.

Quick definition: “Design loads” are code-based forces your building must resist. For Idaho barndominiums, the two that confuse people most are snow load (downward weight) and wind load (uplift + sideways pressure).

Snow load vs. wind load: what they actually do to a barndominium

Snow load (gravity): pushes straight down. It affects roof framing, ridge beams, ceiling joists, trusses, and how loads transfer to bearing walls and foundations. It also drives details like drift zones where snow piles up near higher walls/roof changes.

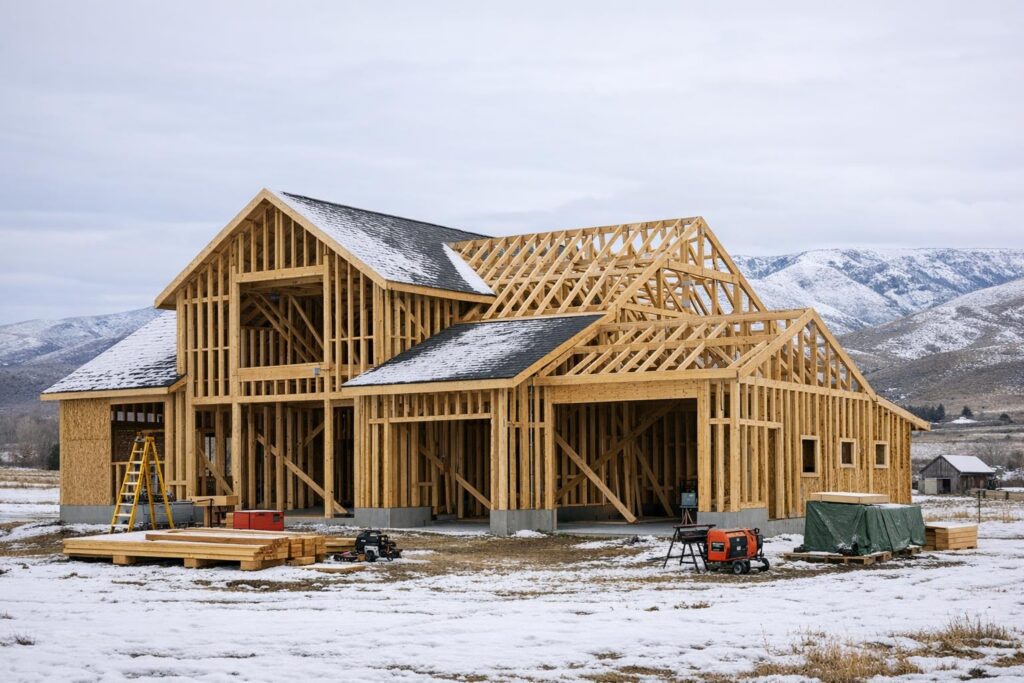
Wind load (pressure + suction): pushes on walls and can pull up on roof edges/corners. Wind load heavily influences roof-to-wall connections, hold-downs, shear walls, bracing, and fastening schedules—especially on large, simple roof planes common in barndominium layouts.

Why “Boise snow load” isn’t a one-number answer

You’ll hear people throw out a single snow load number, but there are two different concepts:

Ground snow load (Pg): a mapped value used as the starting point for design calculations. Boise has published amendments indicating a ground snow load value (commonly referenced as Pg = 20 psf in Boise code language). 

Roof snow load (Pf): what the roof is actually designed for after applying code factors (roof slope, exposure, thermal conditions, importance/risk category, drift, and more). FEMA and ASCE-based guidance distinguishes these clearly because the roof load is not simply the same as the ground load. 

Key takeaway: your roof design snow load depends on your exact roof geometry and site. Big open spans, multiple rooflines, or a taller “shop” volume next to a lower “living” roof can create drift conditions that require additional design attention beyond a single uniform number.

Did you know? Fast facts Idaho builders watch for

Snow maps aren’t the full story. National guidance notes that some locations have local variations and special snow effects, which is why reputable teams confirm project-specific criteria rather than relying on “what my neighbor used.” 
Wind is about more than speed. ASCE 7 wind design depends on exposure category (how “open” your surroundings are), building height, roof shape, and whether you’re checking the main structure or roof edges/corners (components & cladding). 
Permitting often asks for design criteria. For example, City of Boise guidance documents for accessory structures reference local wind assumptions (e.g., a policy citing wind pressure tied to 115 mph for a specific scope). Your actual project may differ by risk category/exposure and should be confirmed for your permit set. 

Step-by-step: how to get snow load & wind load right (without overcomplicating it)

1) Start with your exact site (address + elevation + surroundings)

Snow load can change fast with elevation in Idaho, and wind exposure changes depending on whether you’re tucked into neighborhoods (more sheltered) or building in open country. If you only provide “Boise area,” your criteria may be off.

2) Decide early: roof shape, slope, and any “step-down” rooflines

Drift and unbalanced snow often become the hidden drivers on modern barndominium layouts—especially when a taller shop volume meets a lower living wing. This is one reason designers separate ground snow from roof snow and check more than one snow case. 

3) Make sure your truss/framing package matches the engineered loads (not just a generic “roof load”)

Truss and framing design can go sideways when project documents blur ground snow vs. roof snow assumptions. Industry guidance warns that “roof snow load” alone can be misinterpreted if the intended snow basis isn’t crystal clear. 

4) Ask for connection details that match Idaho wind realities

For wind, the “weak link” is often not the size of a member—it’s the connection path: roof sheathing to trusses/rafters, trusses to top plates, top plates to studs, studs to foundation, and shear transfer at openings. ASCE-based guidance emphasizes that wind design is a system, not a single number. 

5) Keep permit review smooth: document your design criteria on the plans

The fastest reviews happen when the plan set clearly states the governing design criteria (snow, wind, seismic category where required) and shows that structural calculations and details align.

Quick comparison table: what changes snow & wind loads on a Boise-area build

Design factor Mostly affects Why it matters for barndominiums
Elevation / microclimate Snow Idaho snow can vary sharply with elevation; using a “city average” can miss the mark.
Roof slope & shape Snow + Wind Snow sliding/drifting and wind suction at edges change with geometry. 
Exposure category (open fields vs neighborhoods) Wind More exposure can increase pressures and uplift demands. 
Building volume changes (tall shop + low living wing) Snow Creates drift zones where snow piles up at roof transitions. 

Boise & Southern Idaho angle: what locals should watch for

Boise proper has published code language that many people reference for ground snow load (often cited as Pg = 20 psf). 

But the moment you move across the Treasure Valley—or start building toward foothills, benches, or higher-elevation communities—snow load assumptions can change. Some jurisdictions also publish minimum roof design snow loads even when ground snow appears lower, which is why it’s smart to confirm the governing criteria with your local building department and your project’s engineer/designer. 

For wind, local city documents can reference specific wind assumptions for certain building types (like small accessory structures), but custom homes and barndominiums should still be evaluated using the correct risk category, exposure, and roof geometry for the actual site. 

Planning a custom wood-frame barndominium in Boise or Southern Idaho?

Cascade Custom Construction builds premium, personalized barndominiums, pole barns, stick-framed homes, and custom shops—with integrity and quality from design through construction. If you want a plan set that accounts for Idaho snow and wind realistically (and passes permit review cleanly), start with a conversation.

FAQ: Snow load & wind load for Idaho barndominiums

Do barndominiums in Idaho have different snow load rules than regular homes?
The code concepts are the same (ASCE 7/IBC-based loads), but barndominium forms often include larger spans, simpler roof planes, and shop-to-living transitions—conditions that can make drift/unbalanced snow and wind uplift details more critical. 
Is “ground snow load” the same thing as what my roof must hold?
Not exactly. Ground snow load is a starting point; roof snow load is derived from it using code factors and roof conditions, and additional checks can apply for drift and unbalanced loading. 
Why do some Idaho areas list a minimum roof snow load even when the ground snow looks low?
Some jurisdictions publish minimum roof design criteria as a floor for safety/consistency. That’s why it’s smart to confirm the exact jurisdictional requirements for your parcel (city vs county) before finalizing trusses and framing. 
What should I bring to my builder/designer to lock in the right loads?
A site address (or parcel), approximate building footprint, roof slope(s), and a rough layout showing any tall/low roof transitions. That’s enough to start confirming snow/wind criteria and avoid redesign later.
Do I need steel framing to handle Idaho wind and snow?
Not necessarily. Many high-performing buildings in Idaho are wood-framed when engineered and detailed correctly. The key is a complete load path, correct truss/framing design, and permit-ready documentation—not a one-size-fits-all material choice.

Glossary 

Ground Snow Load (Pg): The mapped snow weight on the ground is used as the starting point for roof snow calculations. 
Roof Snow Load (Pf): The snow load used to design roof framing after applying code factors (and checking drift/unbalanced cases when applicable). 
Exposure Category: A wind-design classification based on how open the terrain is around the building (open country vs suburban neighborhoods), which affects pressure on the structure. 
Components & Cladding (C&C): Wind pressures on specific building parts like roof edges, corners, wall zones, doors, and windows—often higher than the “overall building” pressures. 
Load Path: The continuous chain of structural members and connections that transfers snow/wind forces safely down to the foundation.
Scroll to Top