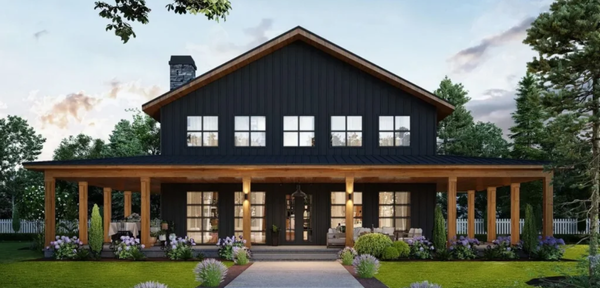
Building a barndominium in Idaho is an exciting journey that offers affordability, durability, and customization. However, understanding the construction timeline is crucial to setting realistic expectations and ensuring a smooth build.
When you’re working with a contractor, this step-by-step guide will break down the barndominium construction process—from planning to move-in day.
How Long Does It Take to Build a Barndominium?
The total construction time for a barndominium varies depending on size, customization, weather conditions, and contractor availability. On average, a fully completed barndominium takes between 8 to 12 months.
Factors That Influence the Timeline:
Permitting and land preparation delays
Availability of materials
Customization level (simple vs. luxury finishes)
Weather conditions in Idaho (winter delays)
By planning ahead and working with experienced builders, you can ensure a faster and more efficient construction process.
Step-by-Step Barndominium Construction Timeline
Contract, Planning & Permits (1 to 3 Months)
Before construction begins, you’ll need to sign a Contract, finalize plans, secure permits, and prepare the land.
Choose a Floor Plan – Decide on square footage, layout, and custom features.
Find a Builder– Research experienced barndominium builders in Idaho..
Secure Financing – Get approval for a construction loan, barndominium-specific loan, or personal financing.
Sign Contract – The builder gives you an estimate and a contract locking in the price to prevent industry or inflation changes.
Drafting + Engineering – Walk through with the builder to customize your drawings and get the engineered stamp.
The Company Obtains the Permits & Approvals – The Company will work with the City or County official for your area to secure building permits and ensure compliance with local codes.
Site Preparation – Clear land, level the site, and determine utility access.
Foundation & Framing (1 to 2 Months)
Once the permits are approved and the site is prepped, construction begins with the foundation and framing.
Concrete Slab Installation – Most barndominiums require a concrete foundation, though some builders use pier systems.
Structural Framing –Wood framing is assembled, forming the skeleton of the barndominium.
Roof Installation – Roofing panels or shingles are secured to protect the interior.
Roofing, Exterior, and Insulation (1 to 2 Months)
With the structure in place, the next step is weatherproofing the barndominium.
Exterior Siding Installation – Metal, wood, or stucco panels are attached.
Window & Door Placement – Openings are installed to provide natural light and access.
Insulation & Sealing – Spray foam or fiberglass insulation is applied to maintain energy efficiency.
Plumbing, Electrical, and HVAC (1 to 2 Months)
At this stage, essential systems are installed to make the barndominium livable.
Electrical Wiring & Outlets – Certified electricians install wiring and breaker panels.
Plumbing & Septic Connections – Pipes, septic systems, and water connections are added.
HVAC Installation – Heating and cooling systems are installed for year-round comfort.
These installations must be inspected before moving to the next phase.
Interior Finishes & Flooring (2 to 3 Months)
Once utilities are installed, it’s time to finish the interior.
Drywall Installation & Painting – Walls are framed, finished, and painted.
Cabinetry & Countertops – Kitchens and bathrooms are fitted with necessary fixtures.
Flooring Installation – Hardwood, tile, or carpet is laid throughout the space.
Doors, Trim, and Light Fixtures – Final aesthetic touches are added.
Customizations—such as fireplaces, vaulted ceilings, or luxury finishes—can extend this phase, but standard barndominiums typically take 2 to 3 months for completion.
Final Inspections & Move-In (1 to 2 Months)
Before moving in, your barndominium must pass final inspections to meet Idaho building codes.
City & County Inspections – Ensuring compliance with local regulations.
Final Touch-Ups – Painting, sealing, and cleaning.
Certificate of Occupancy – Official approval to move in.
Once approved, it’s time to furnish and enjoy your new barndominium!
Common Delays & How to Avoid Them
Permitting & Paperwork Issues
Work with experienced builders who understand zoning laws.
Start permit applications early to prevent unexpected delays.
Weather-Related Delays
Plan major work during Idaho’s milder months (spring & summer).
Prepare for cold weather delays if building in the fall or winter.
Contractor Scheduling Conflicts
Choose a builder with a solid reputation and availability.
Avoid seasonal delays by booking your contractor early.
How to Speed Up Your Barndominium Build
Work With One General Contractor – Having one builder handle everything reduces coordination delays.
Be Communicative and Diligent – Be available for your builder throughout the entire process to speed up any possible communication delays.
Start Your Barndominium Build in Idaho
Building a barndominium is a rewarding investment, and understanding the timeline helps you plan ahead and avoid surprises. Whether you’re self-building or hiring a contractor, working with experts will ensure a smooth and efficient construction process.
At Cascade Custom Construction, we specialize in barndominium builds in the Treasure Valley and surrounding areas. Our team provides expert guidance, transparent estimates, and high-quality craftsmanship. Contact us today to discuss your project, get a custom quote, and start building your dream barndominium!


